

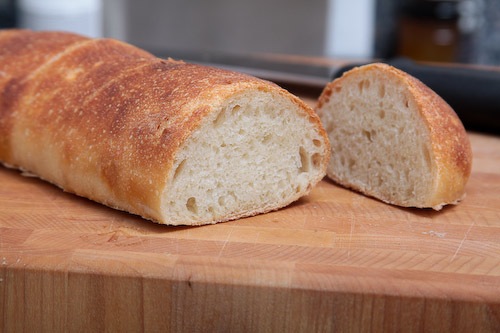
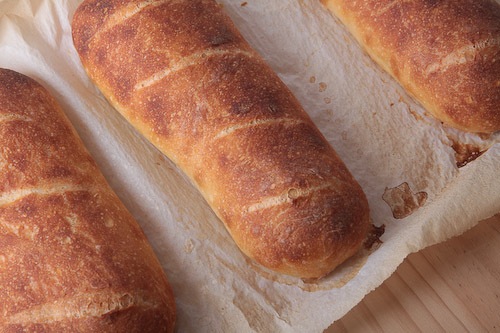
Don’t let the simplicity of the recipe fool you though, the bread is amazingly good. The crumb is full of small holes, with a crust that is chewy but not tough. The long, overnight rise gives the bread a complex flavor. Letting the entire batch of dough sit all night gives the dough plenty of time to relax and makes it a little easier to work with.
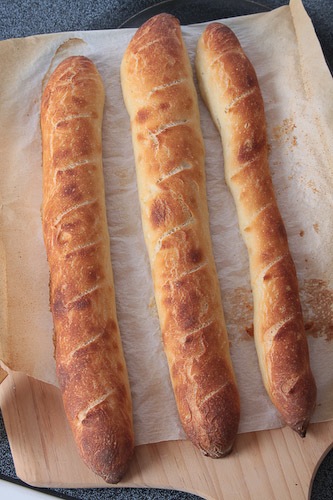
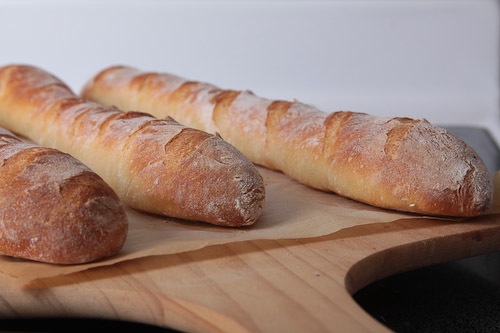
I usually bake two batches (four oven loads) of bread and freeze most of it. We then take out a loaf or two and let it defrost in the fridge whenever we need bread. There are many ways to shape the bread. The simplest shape is to simply spread the dough out, cut it into strips and then stretch those strips out. This time I shaped the dough into two, slightly more complex shapes. The torpedo is perfect for cutting in half horizontally and making sandwiches. You can also take the torpedo-shaped dough and turn it into a baguette. These baguettes are a little skinny, but are perfect for breakfast toast.

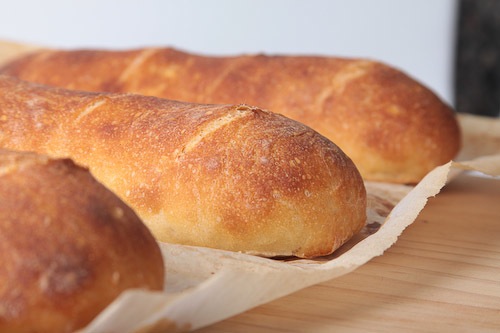
I like to spray the crusts of the bread with water before I place them in the oven. It gives the crusts a bubbly, crisp crust. If you don’t do this the breads will have a floury crust that also looks awesome. I would try a mix of the two methods and see which you like best.
This recipe produces a very wet dough. You are going to have to use a bit of flour when handling it. I got a Pastry Mat
This recipe comes from The Bread Baker's Apprentice
This is a very forgiving recipe. Don’t worry if it looks complicated, you can leave steps out, get a little sloppy and still get good results. Instead of worrying about the water temperature for the dough, I just use cold tap water. Instead of fumbling with a pan of water in the oven, I just spray down the sides of the oven. It is more important to try this recipe than worry about its exacting details.
Pain a l’ancienn
From: The Bread Baker's Apprentice: Mastering the Art of Extraordinary BreadDays to Make: 2
Day 1: 10 to 15 minutes mixing.
Day 2: 2 to 3 hours fermentation, shaping, and panning; 15 to 30 minutes baking.
Ingredients:
- 6 cups (27 ounces) unbleached bread flour
- 2 1/4 teaspoons (.56 ounce) salt
- 1 3/4 teaspoons (.19 ounce) instant yeast
- 2 1/4 cups plus 2 tablespoons to 3 cups (19 to 24 ounces) ice cold water (40°F)
Directions:
Day 1
- Combine the flour, salt, yeast and 19 ounces of water in the bowl of the electric mixer with the paddle attachment and mix for 2 minutes on low speed. Switch to the dough hook and mix for 5 to 6 minutes on medium speed.
- The dough should be sticky on the bottom of the bowl, but it should release from the sides of the bowl. If not, sprinkle in a small amount of flour until this occurs (or dribble in water if the dough seems too stiff and clears the bottom as well as the sides of the bowl).
- Lightly oil a large bowl and immediately transfer the dough with a spatula or bowl scraper dipped in water into the bowl. Mist the top of the dough with spray oil and cover the bowl with plastic wrap.
- Immediately place the bowl in the refrigerator and retard overnight.
- The next day, check the dough to see if it has risen in the refrigerator. It will probably be partially risen but not doubled in size (the amount of rise will depend on how cold the refrigerator is and how often the door was opened). Leave the bowl of dough out at room temperature for 2 to 3 hours (or longer if necessary) to allow the dough to wake up, lose its chill, and continue fermenting.
- When the dough has doubled from its original pre-refrigerated size, liberally sprinkle the counter with bread flour (about 1/2 cup). Gently transfer the dough to the floured counter with a plastic dough scraper that has been dipped in cold water, dipping your hands as well to keep the dough from sticking to you. Try to degas the dough as little as possible as you transfer it. If the dough is very wet, sprinkle more flour over the top as well as under it. Dry your hands thoroughly and then dip them in flour.
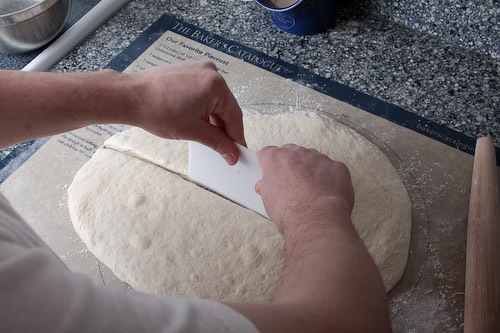
- Roll the dough gently in the sprinkled flour to coat it thoroughly, simultaneously stretching it into an oblong about 8 inches long and 6 inches wide. If it is too sticky to handle, continue sprinkling flour over it. Dip a metal pastry scraper into cool water to keep it from sticking to the dough, and cut the dough in half widthwise with the pastry scraper by pressing it down through the dough until it severs it, then dipping it again in the water and repeating this action until you have cut down the full length of the dough. (Do not use this blade as a saw; use it as a pincer, pinching the dough cleanly with each cut.) Let the dough relax for 5 minutes. Shape the dough pieces using one or more of the techniques below.
- Prepare the oven for hearth baking by placing a pizza stone or baking tile on the a rack set to the second lowest position. (Optional: Set an empty pan for steam on a rack set below this.)
- Preheat the oven to 500°F (550°F if your oven goes this high).
- Take 1 pan to the preheated oven and carefully slide the dough, parchment and all, onto the baking stone (depending on the direction of the stone, you may choose to slide the dough and parchment off the side of the sheet pan instead of off the end); or bake directly on the sheet pan. Make sure the pieces aren’t touching (you can reach in and straighten the parchment or the dough strips if need be).
- (Optional: Pour 1 cup of hot water into the steam pan and close the door.)
- After 30 seconds, spray the oven walls with water and close the door. Repeat twice more at 30-second intervals. After the final spray, reduce the oven setting to 475°F and continue baking. Meanwhile, dust the other pan of dough strips with flour, mist with spray oil, and cover with a towel or plastic wrap. If you don’t plan to bake these strips within 1 hour, refrigerate the pan and bake later or the next day. If you’d like to bake them as rustic, ciabatta-style breads, leave them at room temperature for 1 to 2 hours and then bake. As the loaves proof, they will resemble and perform like ciabatta.
- The bread should begin to turn golden brown within 8 or 9 minutes. If the loaves are baking unevenly at this point, rotate them 180 degrees. Continue baking 10 to 15 minutes more, or until the bread is a rich golden brown and the internal temperature registers at least 205°F.
- Transfer the hot breads to a cooling rack. They should feel very light, almost airy, and will cool in about 20 minutes. While these are cooling, you can bake the remaining loaves, remembering to remove the parchment from the oven and turn the oven up to 500°F or higher before baking the second round.
Shaping:
Basic
- Take one of the dough pieces and repeat the cutting action, but this time cut off three equal-sized lengths. Then do the same with the remaining half. This should give you six lengths.
- Cover the back of two 17-by-12-inch sheet pans with baking parchment and dust with semolina flour or cornmeal.
- Flour your hands and carefully lift one of the dough strips and transfer it to an inverted parchment-lined pan, gently pulling it to the length of the pan or to the length of your baking stone. If it springs back, let it rest for 5 minutes and then gently pull it out again. Place three strips on the pan, and then prepare another pan and repeat with the remaining strips.
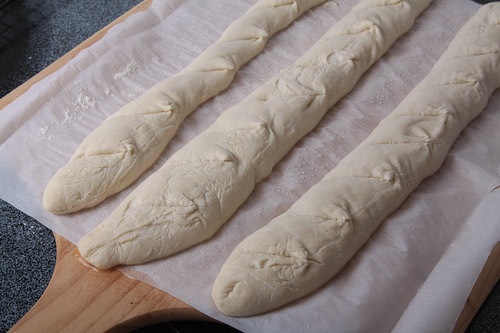
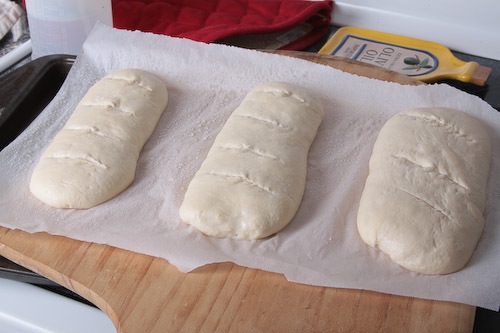
- Score the dough strips as for baguettes, slashing the tops with three diagonal cuts. Because the dough is sticky, you may have to dip the razor blade, serrated knife or scissors in water between each cut. You may also omit the cuts if the dough isn’t cooperating.
Torpedo
- Take one of the dough pieces and repeat the cutting action, but this time cut off three equal-sized lengths. Then do the same with the remaining half. This should give you six lengths.
- Cover the back of two 17-by-12-inch sheet pans with baking parchment and dust with semolina flour or cornmeal.
- Flour your hands and transfer one of the dough pieces to a well floured area. Gently pat the dough into a rough rectangle.
- Without degassing the piece of dough, fold the bottom third of dough, letter style, up to the center and press to seal, creating surface tension on the outer edge.
- Fold the remaining dough over the top.
- Use your hand to seal the seam closed and to increase the surface tension all over.
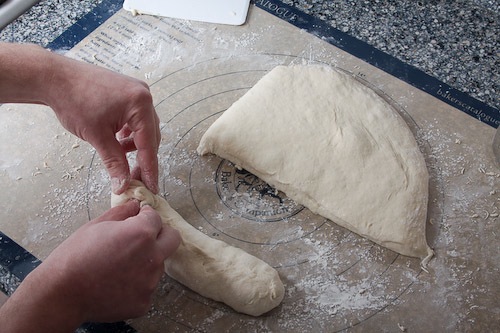
- Flip the dough over and fold the very ends of the piece, pinching to close.
- Flip the dough back over so that the seam is on the bottom and set aside to rise or shape into a baguette.
Baguette
- Shape the pieces as torpedos and allow them to rest for 5 minutes.
- Lift the dough and gently pull it out from the ends.
- Crease the dough down the middle.
- Fold the top part of the dough down over the bottom part.
- Use your hand to seal the seam closed and to increase the surface tension all over.
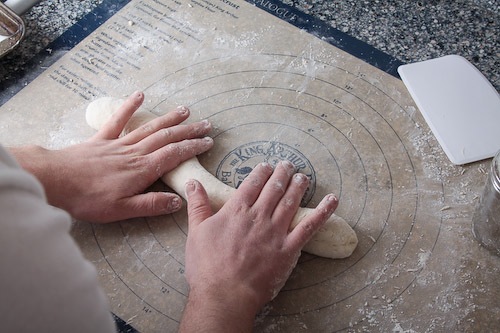
- Working from the center of the loaf and moving towards the edges, gently but firmly rock and roll out the dough to extend it to the desired length.
- If the dough is too elastic and springs back to less than the desired length, allow it to rest for another 5 minutes.
- Set the baguette aside for proofing.
Dividing the dough:
Photo 1:
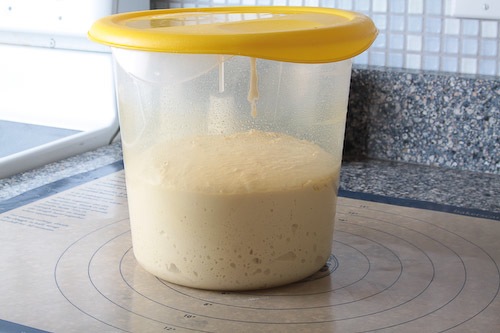
Photo 2:
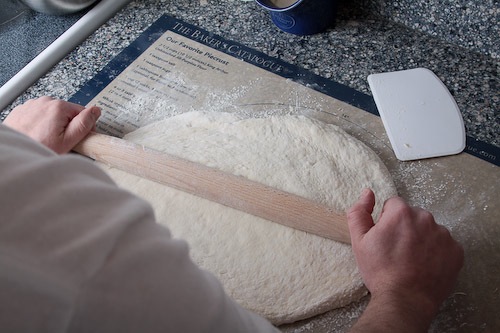
Photo 3:
Torpedo:
Photo 4:
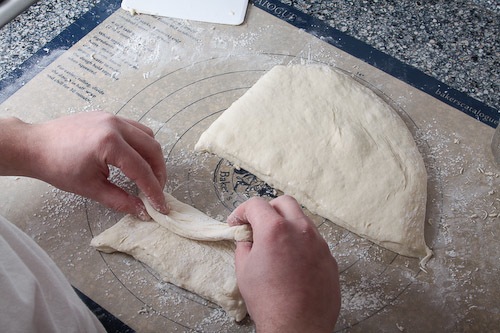
Photo 5:
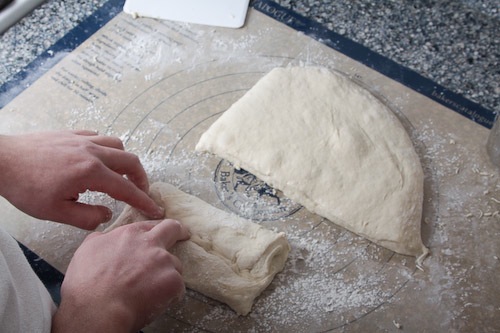
Photo 6:
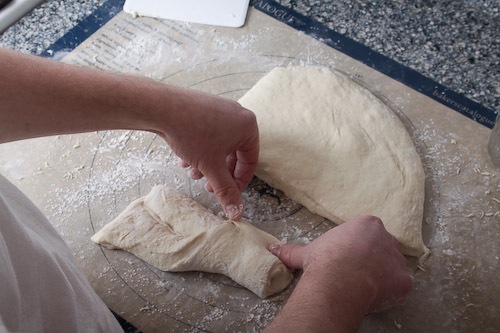
Photo 7:
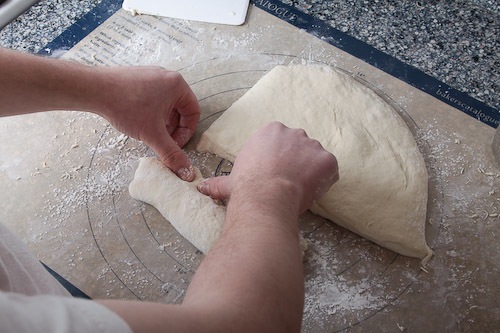
Photo 8:
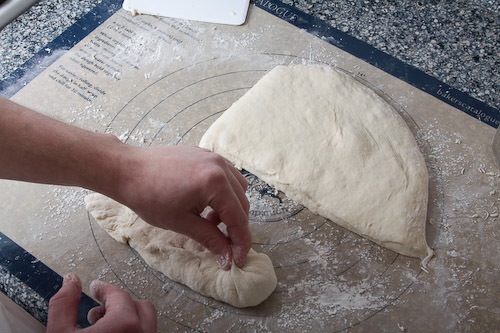
Photo 9:
Baguette:
Photo 10:
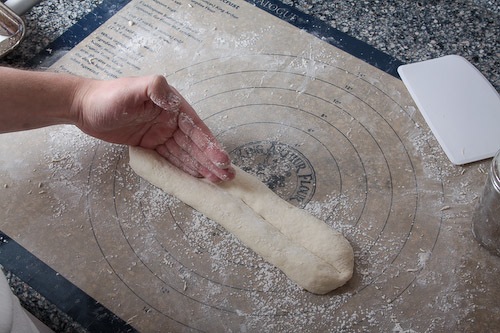
Photo 11:
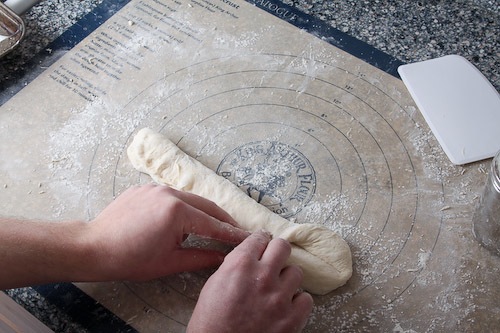
Photo 12:
Bonus Photos!
Photos From: cookography.com
They are really wonderful breads!
ReplyDeleteBake them every week, since 4 years, my hottest seller. I replace 10% bread flour with whole rye, and, also, add a little rye sourdough.
Shaping is really a bit of overkill, cutting in slices works just fine with this highly hydrated dough.